Building a Frame that Facilitates Adequate Dosage of Vitamin G
“I started off with the best of intentions, and by the end my goal was to finish without throwing up”
James Bleakley (quoting/paraphrasing from "Born to Run")
Inspiration
James’ quoting of “Born to Run” has striking applicability to many situations, particularly those involving adventures on a bicycle. After the last Gritty Brevet, I remember sitting down after 9+ hours of gritty gravel goodness. My toes felt like ice cubes after riding through wet windy 40-45 degree temperatures with over 1700 feet of climbing. My fingers felt like lethargic insects enduring last days of warm weather before the frost hits. I was soaked head to toe, cold, exhausted, and remember that I couldn’t have been happier.
People ride bicycles for myriad reasons. Personally, I chose to ride for simplistic joy that comes from the experience atop two wheels. I think it’s fair to say that many of us ride because it’s an itch that can only be scratched by the cadence of a pedal stroke and the scenery in which we find ourselves. Long miles of gravel and b-roads in the Iowa countryside allows more than adequate time for introspection. Endless rolling hills of Iowa countryside leaves one second guessing their decision for voluntary discomfort and pain. Why choose to ride in less than ideal conditions? Because the journey from A to B on any given day offers more than any television show, impulse purchase, or money in the bank can. I’ll take pedaling through rain, snow, sleet, or mud over an office chair any day.
When setting out to build a frame, my ambitions were admittedly lofty. I wanted to build a bicycle that would allow me to go anywhere and do anything – a bike that would take on 100+ miles of gravel one day, tackle single track the next, or hit the open road fully loaded for a long tour when time permits. At the time, I had plans/ambitions to riding the Tour Divide - a 2,700 self-supported mountain bike "race" from Banff, Canada to Antelope Wells, NM at the Mexico Border. So, I elected to design and build a touring 29er based on the Salsa Fargo. As the semester progressed and progress on the frame crawled along, the statement from James became increasingly relevant. Advice from Teesdale, Chris P. (“Chrispi”), James, and Steve all provided the much-needed guidance in building a frame that would serve a more limited function but serve it well.
I still remember my first bike, a metallic blue Schwinn with chrome fenders. At the time, it was an aesthetically awesome bicycle, but impractical for exploring the farm where I grew up. Not long after “Santa” gave me a beat up dirt bike, which proved a much better machine for exploring the acres of woods, creek, and fields. With clarity, I am able to recall that initial sense of freedom that came with a bicycle – and it’s one of the reasons I still remain incredibly fond of this wonderfully simple machine. That sense of freedom that came with a bicycle was what I might have initially been chasing when attempting to design a “do it all frame”.
I wanted to build a bike that would be at home on gravel and "B-Roads" (minimum maintenance roads), but could also serve as a touring bike and commuter. I lengthened the chainstays a bit for a longer wheelbase and dropped the bottom bracket just a bit for added stability for loaded touring.
Frame Design
I settled on taking an established geometry and changing it slightly. This way, if I liked the frame more than the original counterpart, I would know why. Conversely, if I didn’t like it – I would know why for the same reason. Originally, I aimed to build a 29er+ but decided that since I have a fat bike and a 29er that this particular type of build may be too narrow in terms of purpose.
-
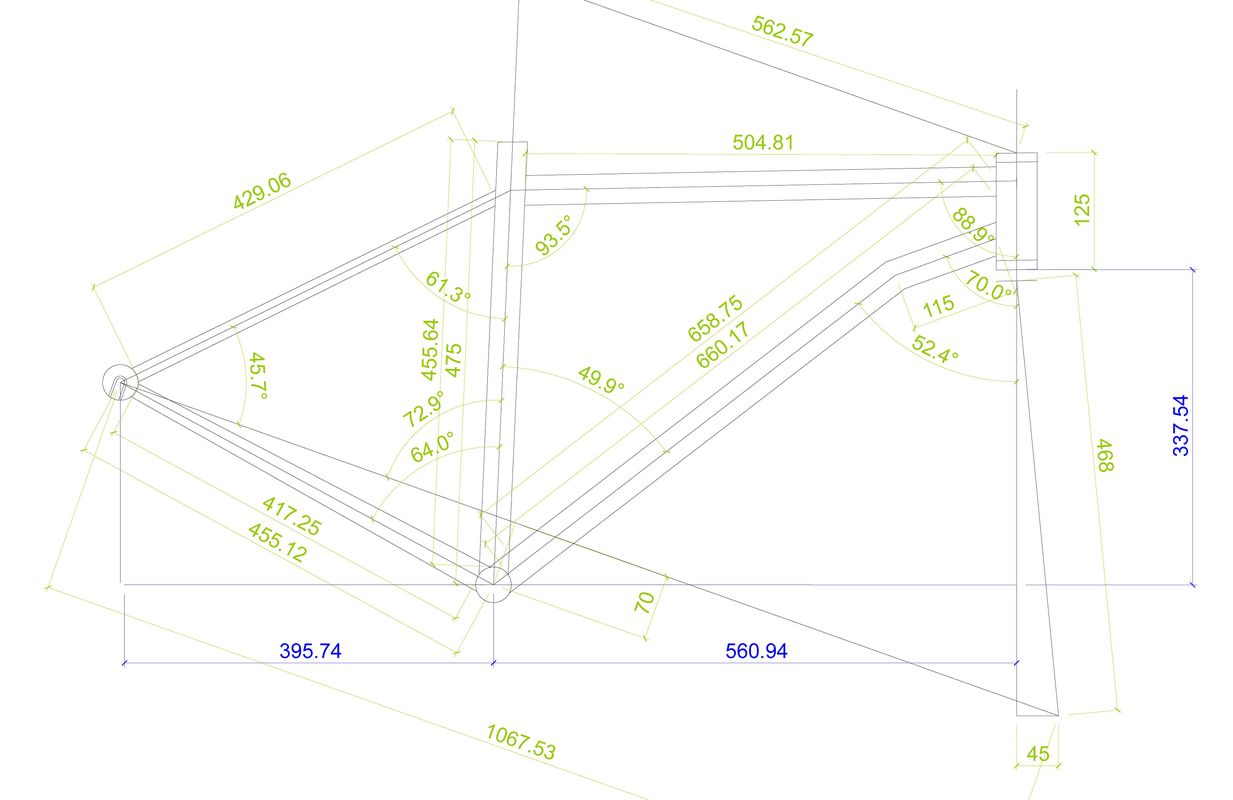 Here's an image of the CAD design with most of the dimensions (in millimeters) tilted so the head tube is 90° to the ground.
Personally, the aforementioned sense of freedom that comes from a bicycle is when you are able to hop on the saddle and simply ride – with no particular destination in mind. For this reason, I aimed my sights to design a frame similar to the Salsa Fargo. The Fargo blends a relaxed touring geometry with and nimble responsiveness. It’s a fantastic and tested geometry for a touring 29er – a bicycle that can do most of what I would ask of it.
Long chain stays give it a more supple ride, as they lengthen the wheel based and can help provide clearance to avoid heel strike when riding with panniers. The bottom bracket was also lowered about 10 mm a bit as well to emulate the feel of my current touring bike a bit more. The seat tube angle was slackened to increase the effective top tube length, simply because I prefer to be a bit more stretched out without having a long stem. A down tube with a 150 bend was also added per the true Fargo design in order to ensure fork crown clearance.
An added benefit of these design changes was creating a main triangle that would fit my current Revelate frame bag set up!
The small changes were enough to keep the build uniquely my own while walking a somewhat “familiar” path, or simply, having a clear idea in my head of where things were going. Still, I found myself waking in the middle of the night multiple times throughout the semsester to sketch out and record ideas that were keeping me awake.
Another element of frame design is components to be used. An ever growing stockpile of parts in my shop always makes me lean toward repurposing/reusing parts instead of buying new. “Preserving options” was one of the main reasons I wanted to use a 73mm bottom bracket shell, which accepts common and inexpensive Shimano square taper cartridge bottom brackets. My initial aim was to use an old Deore LX triple touring crankset, bar end shifters, with disc brakes on hand built wheels. Luckily, I was able to build some great wheels on Alex Rims laced to a Phil Wood rear hub and Shimano Alfine generator front hub. Since building up a generator hub a couple years ago, I have come to rely on the constant and reliable source of power for lights. wheels)
Inspiration from NAHBS
The North American Handmade Bike Show was an incredible source of inspiration and knowledge. Looking at hand built frames and picking the brains of multiple frame builders was a treat and incredible asset. Ira Ryan from Breadwinner advised in tacking in the “X” and “Y” axis in order to prevent the tubes from being pulled off the center line of the bike. I attempted this when tacking, but found those spots were often the hardest to weld.
There were also numerous elegant solutions to a myriad of problems. Harvey cycles developed a fork with internal cable routing for dynamo hubs that results in a clean and polished look while still maintaining functionality. The welds on Brompton bikes are incredible. Brompton, the paragon of folding bikes, has built a name for themselves doing one thing, and doing it well.
Peacock Grove builds “out of the ordinary” bicycles that stand out while still maintaining a high degree of functionality. The Minneapolis-Moline Cargo Bike was a sight to see, and one that provided a bit of inspiration for what I hope to build next.
-
 Simply admiring the incredible welding ability
 -
 Long-ish tail 29+ titanium frame from Moots made for doing serious single track maintenance.
 -
 Incredible fillet brazing down by the people at Brompton Bikes. These guys were super cool to talk, and they do amazing work.
 -
 Dual headlights running on a generator hub. This bike was a superior "all-rounder"
 -
 Work done by Harvey Cycle Works. He had elegant solutions and incredible craftsmanship. Here is the exti of his internal cable routing for a generator hub.
 -
 Fork blade entry of the interanally routed light cable. So elegant!
 -
 Ornate dropouts for Peacock Grove. The bike was made from vintage Reynolds tubing with vintage Lugs
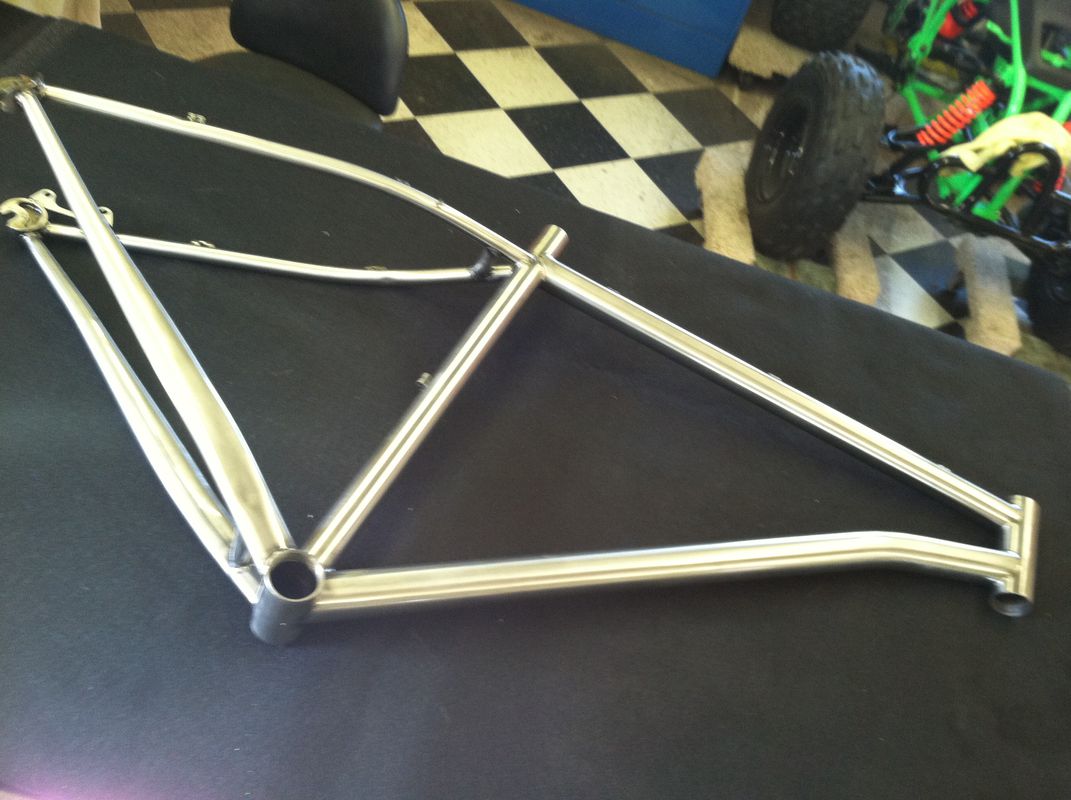
Putting the Pedal to the Metal
Perhaps the scariest part of building is actually starting to weld the frame. I built numerous “TiGgies” – trying to emulate angles/joints I would encounter while building. I balanced time between cutting/coping tubes, and building TiGgies. Generally, I pride myself in my ability to think and problem solve spatially. However, cutting tubes for a bike frame proved to tax this ability more than I anticipated. I probably walked several miles just to and from my jig trying and retrying tube fittings.
Even with diligent checking and rechecking I managed to incorrectly cut my top tube, which resulted in a slight steepening of the seat tube angle. I also had quite a gap to fill on the seat tube/down tube joint – a weld I was dreading. The rear triangle also took numerous hours to cut and cope to moderately acceptable joints. I incorrectly cut one chain stay but managed to leave enough length to correct for it. Marking out the set stays to bend was also a great idea, which helped me gain footing in the realm of bending tubes. Josh, once again, gave sound advice to mark straight lines, and 1-inch increments in order to keep track of where bends are occurring.
Getting the main triangle tacked and welded was a good warm up and perhaps gave me a false sense of confidence – for it was much easier than the rear triangle. Only having “Seat stays and chain stays” remaining took on even greater meaning when I started on the rear triangle. Tight joints and thin tubing made for a long day of welding, fortunately, I didn’t burn too many holes in the process. For tacking and welding, some of the thinner walled tubing I turned the peak heat down in order to help mitigate the risk of burning holes. Once I got a feel for the properties of a particular joint I would adjust the peak as needed.
I elected to bend the bridges to add a bit more elegance to the remaining elements of the frame. With the cable guides were mounted, it was ready to start building!
-
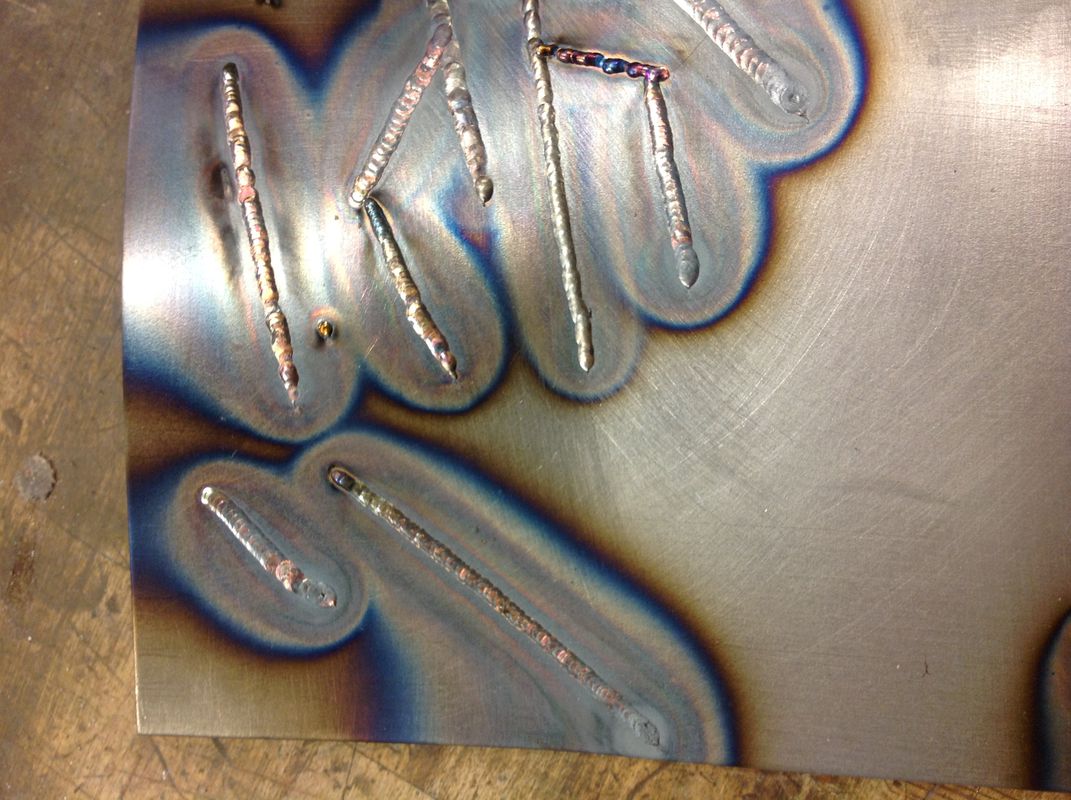 Practicing TiG welding on a flat surface
 -
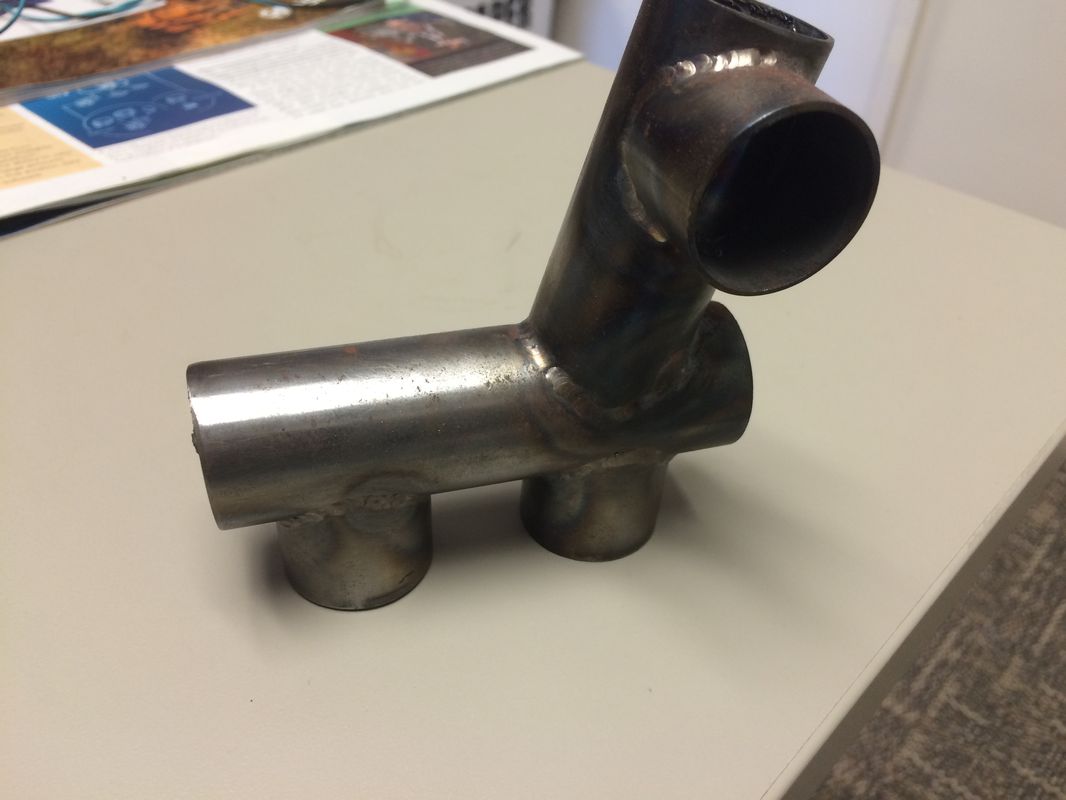 Practice Tiggy that now lives as a desk ornament.
 -
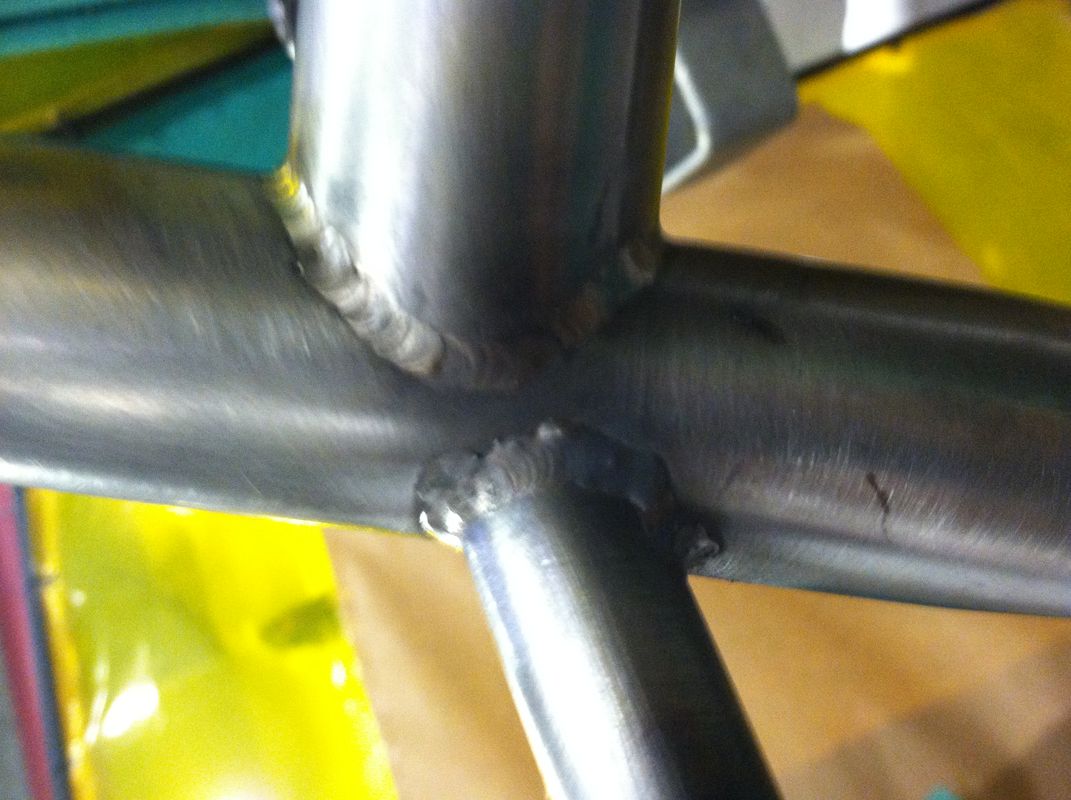
 Bottom Bracket welds
 -
 Another angle of the BB welds.
 -
 Biew of the bridges welded in place.
 -
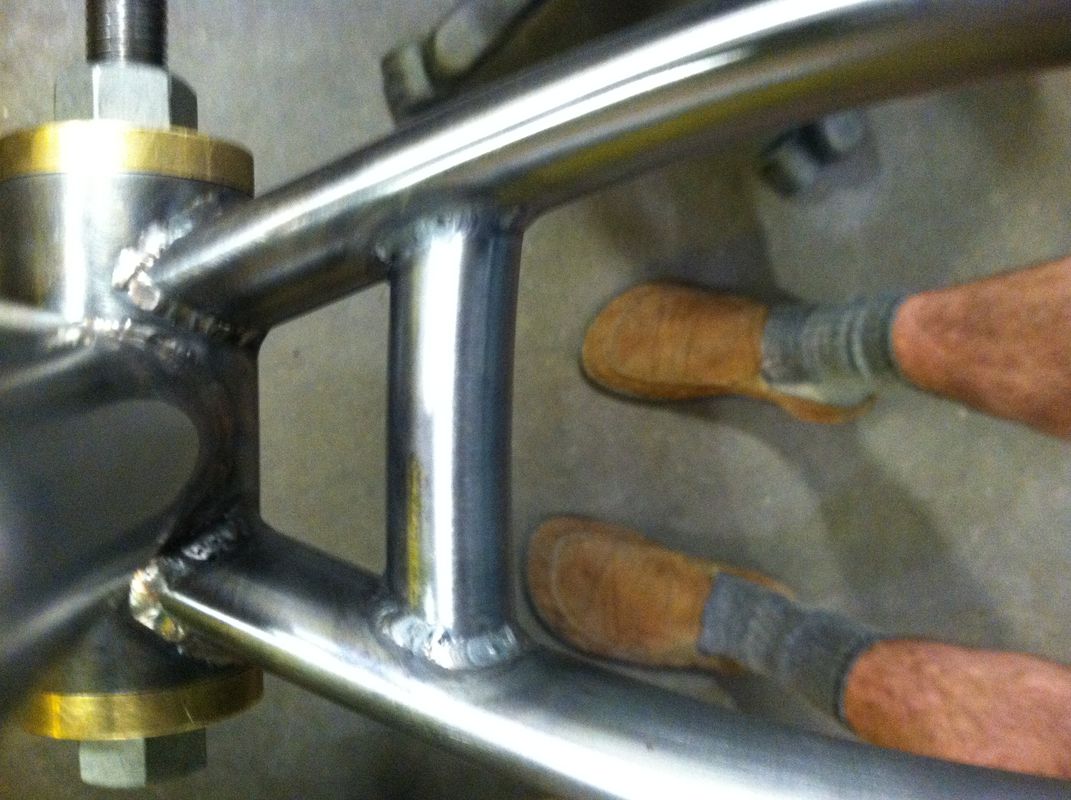 Chainstay bridge close up.
 -
 another view of the chainstay bridge
 -
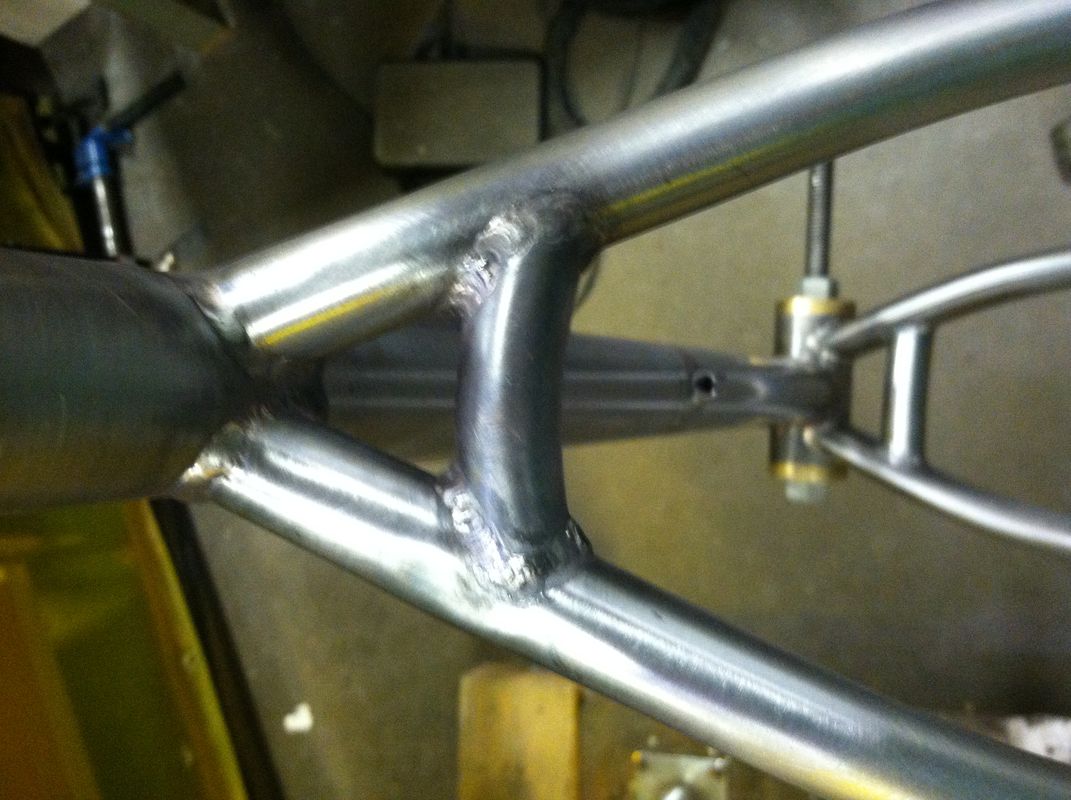
 view of the welds for the chainstay. The bridges were one of the most difficult pieces to weld..
 -
 Welds at the head tube. These weren't too difficult to accomplish
 -
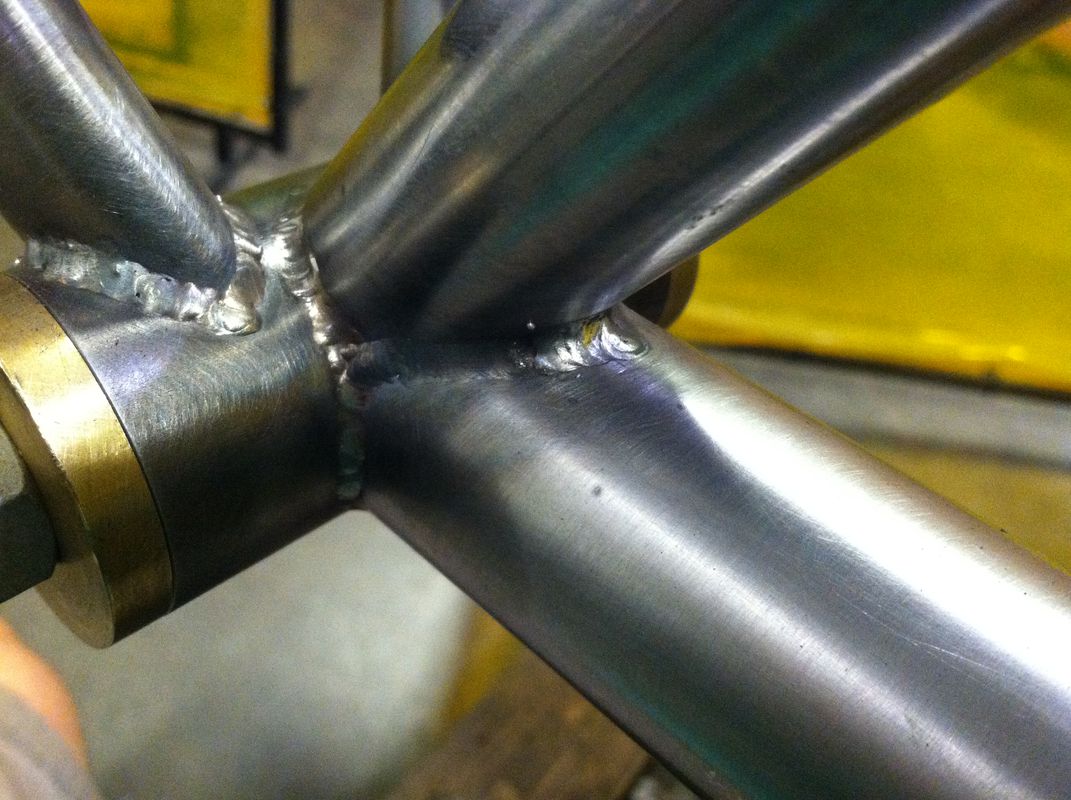
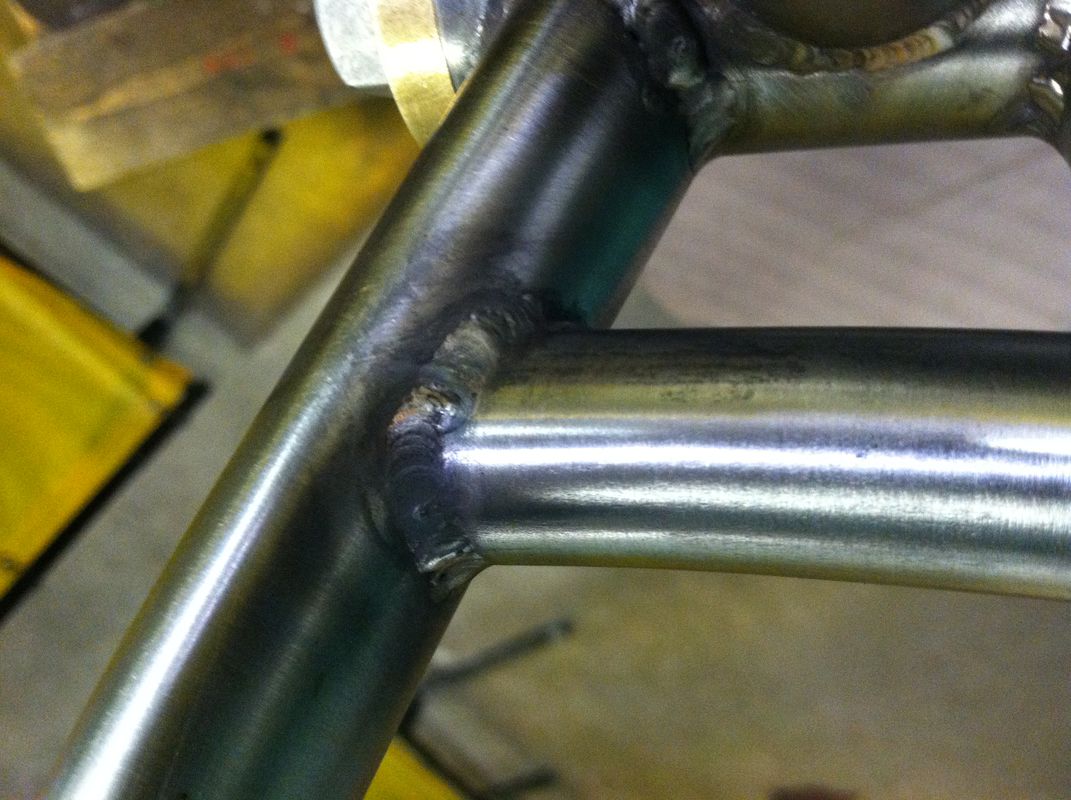
 Welds at the seatube, toptube, and seatstay junction. There's a lot going on at this junction in the frame and it was a bit difficult to negotiate.
 -
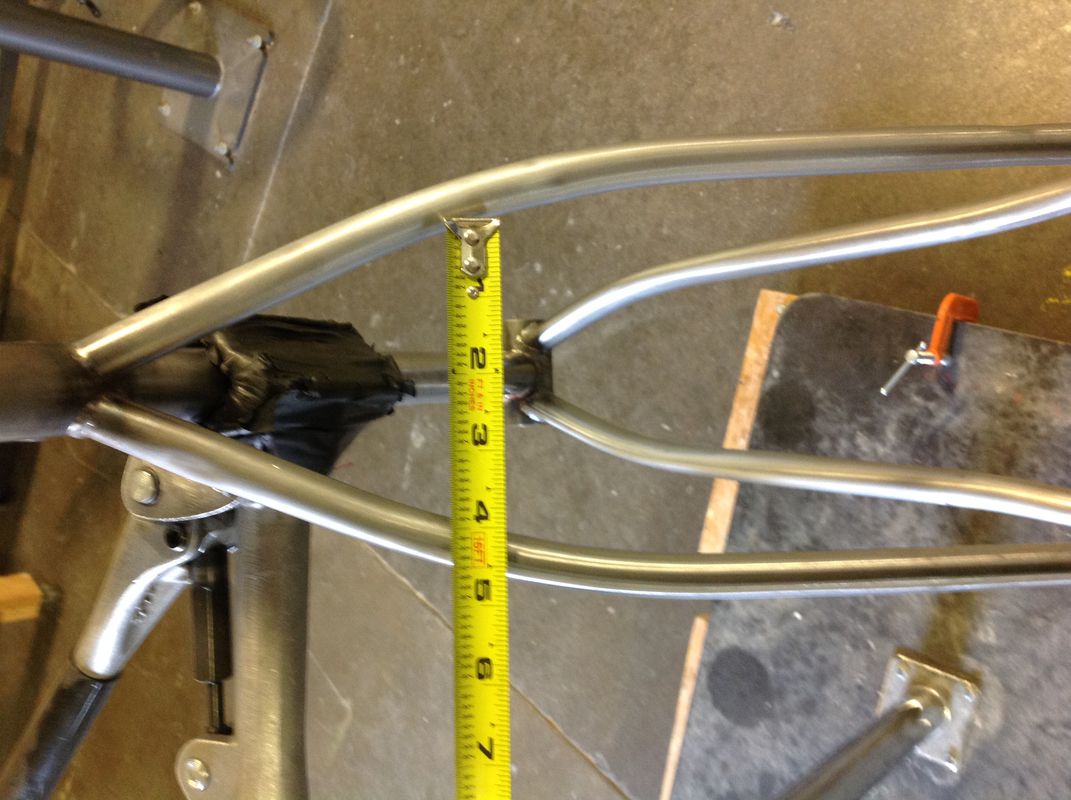 Putting at tape on the potential tyre clearance. 4 inches! The bend in the seatstays is also visible here. I didn't do anything too fancy for a bend, just enough to gain some tyre clearance.
Building up the Frame
Since learning to build wheels 4-5 years ago, I have always preferred to build my own wheels for my bicycles. The process, itself, is relaxing and gives one a sense of accomplishment when tensioned and trued. This feeling does pale in comparison to finishing a nice weld on a frame, but it still does help provide a sense of stock or ownership in how a bicycle ultimately rides – the more control you have over the elements going into a bicycle, the better the relationship with that individual machine.
I towed the frame down to the Bike Library to work on since I needed a headset press and a few other tools required for building up a frame. I was disappointed that I wasn’t able to use the old Deore LX touring crankset. Instead, I procured a SRAM x7 crankset with external bearings which improved the chain line and provided just enough clearance for the chainrings. Still, an old XT rear and LX front derailleur respectively were able to be used.
I was worried that bumping down to a double crankset would decrease the gearing range too much. But, after a 17-mile test ride on some of Iowa’s finest gravel and level B roads I was not in need of any higher range when on downhills or flats, nor lower gears when pulling up hills. The drive side chain stay may still need to be pinched a bit to provide a bit more chainring clearance.
| Component | Part |
|---|---|
| Front Hub | Shimano Alfine Generator Hub |
| Front Rim | Alex Adventurer |
| Front Tyre | Schwalbe Racing Ralph |
| Rear Hub | Phill Wood Mountain Hub 32h |
| Rear Rim | Alex Adventurer |
| Rear Tyre | Schwalbe Racing Ralph |
| Casette | Shimano HG 8 speed |
| Rear Derailleur | Shimano Deore XT 8 speed |
| CrankSet | SRAM X7 |
| Front Derailleur | Shimano Deore LX Triple |
| Pedals | Speedplay Frogs with titanium spindles |
| Brakes | Avid bb7 with GS2 rotors |
| Brake Levers | Tektro RL520 |
| Handle Bars | Salsa Cowchippers |
| Shifters | Shimano 8 speed bar end shifters |
| Saddle | Brooks b15 (much older than the linked version) |
-
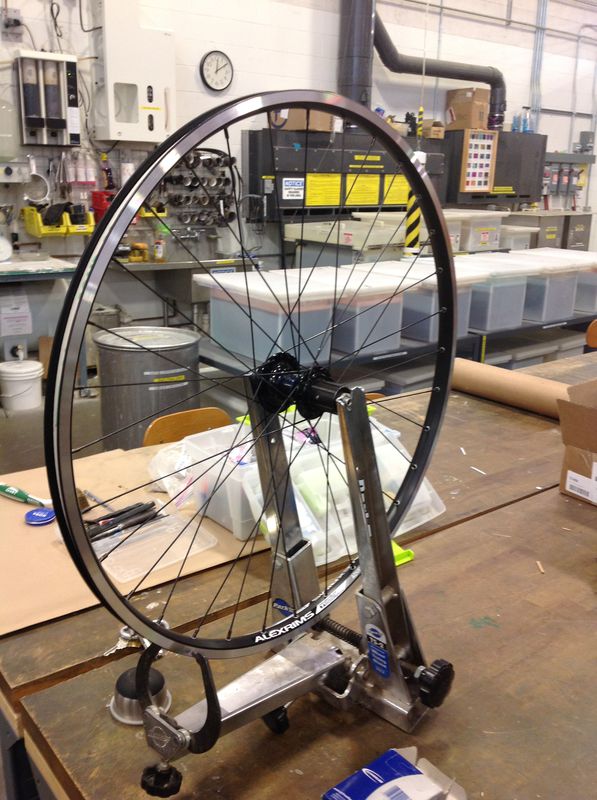 Building up the Phil Wood hub to an Alex Adventurer rim.
 -
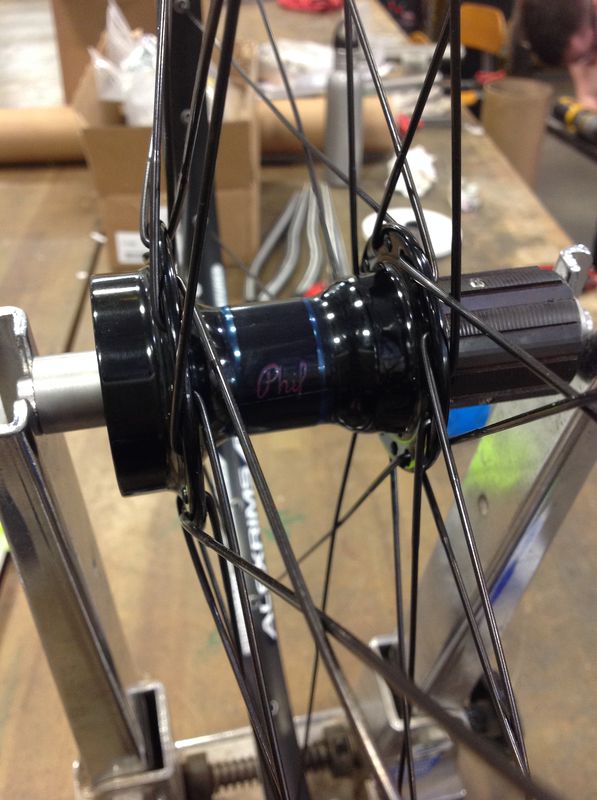 Close-up view of the shiny new hub that sounds like an angry hornet when coasting.
 -
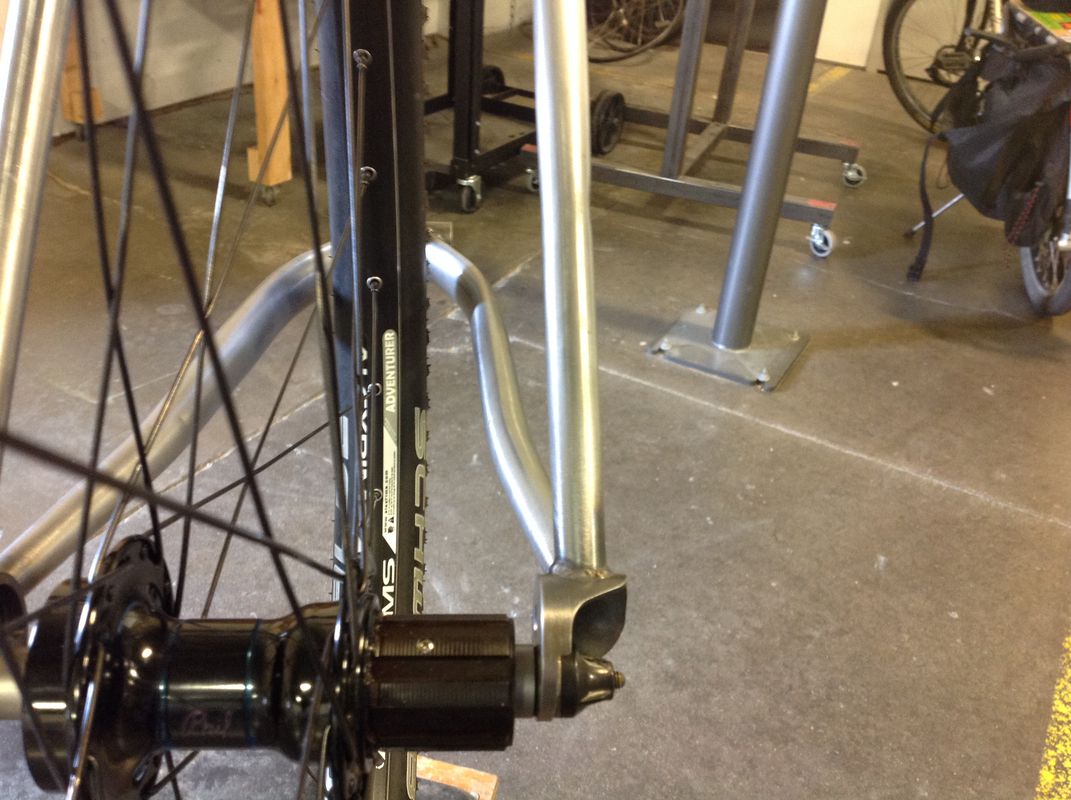
 Checking our the rear end of the bike with the wheel in the rear triangle.
 -
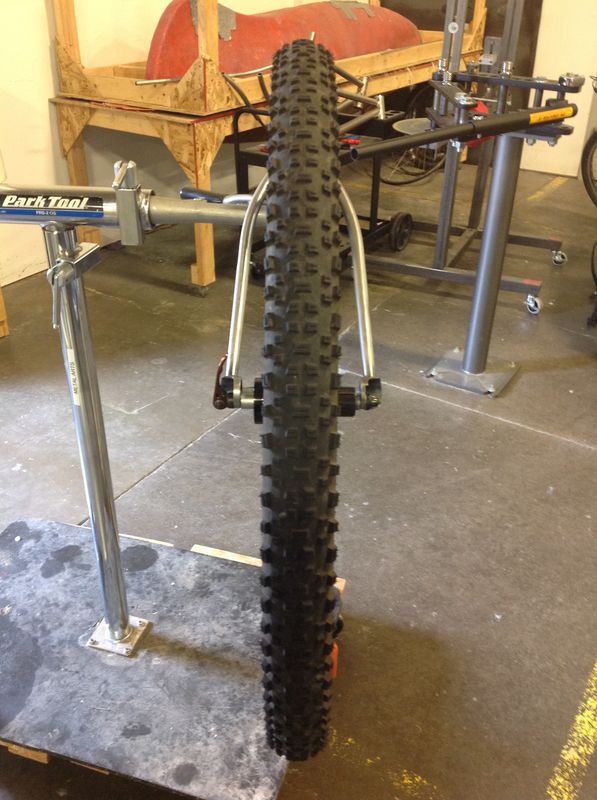
 Spacing betwenen the tyre and chainstay provides ample room for a big tyre.
 -
 roughly 0.5" on either side with a 2.35" tyre on the rim. Enough to maybe squeeze a 3" tyre on!
 -
 Building up the frame to make sure no changes need to be made before sending it to powder coat.
 -
 Fresh from powdercoat. I had a clear powdercoat put on by Chris at RFE. He did a fantastic job!
 -
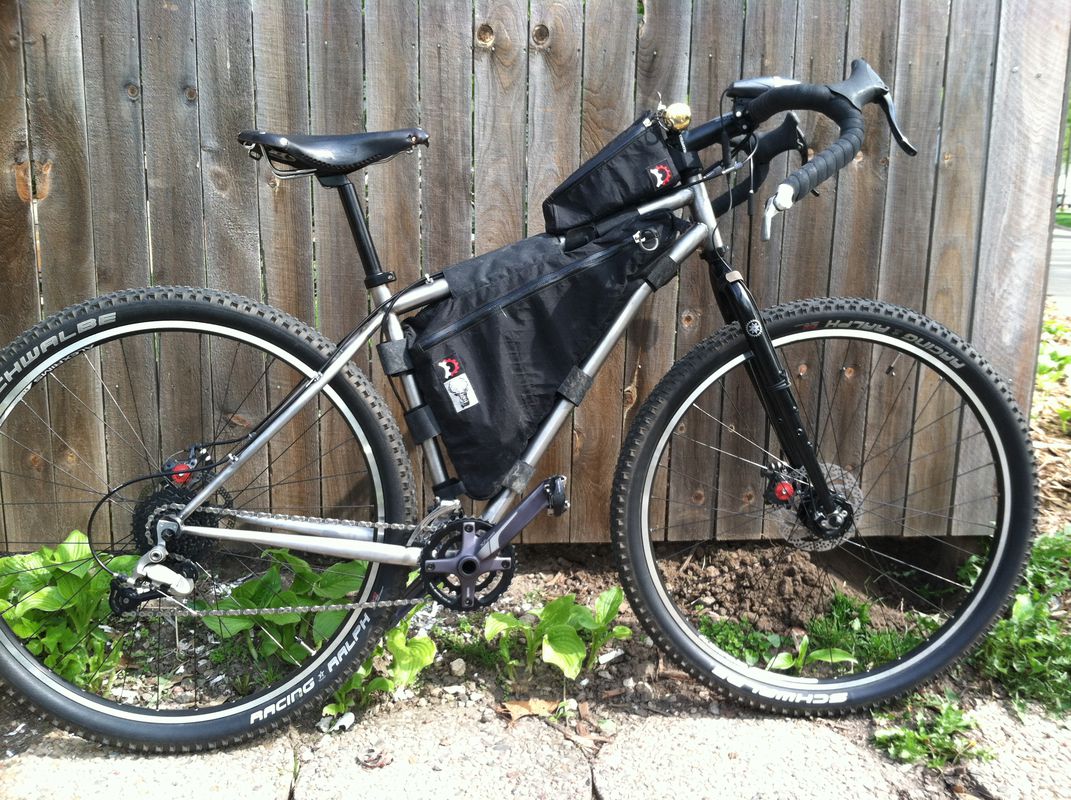 Here's the complete build right before I took it out for a test ride. The c-c toptube dimenions were a bit shorter than I like and I ended up putting Salsa Cowchipper bars on along with Speedplay Frog pedals."
 -
 A photo from the cockpit of the maiden voyage exploring Iowa Gravel, and in this case B-Roads - the best type of road."
 -
 After the test ride I realized the non-drive side crank arm was hitting the chainstay so I tried to "coerce" it a bit. Sadly, I put a crease in the chainstay..."
Final Thougths and Looking Forward
Test rides on the new frame have allowed for that much needed time to get lost in thought. Building a frame only wets the appetite and sparks further creativity. I do enjoy taking the fastest route out of town to explore the countryside, but I’m also a utility cyclist – riding for transportation more often than for recreation or sport.
The idea behind exhibiting bikes at NAHBS is to build “head turners” - bikes you don’t see every day. With this in mind, I would like to combine my affinity for utility with the parameters we’re aiming to work within for NAHBs bikes. Peacock Grove had one of the very few cargo bikes at NAHBS, but it wasn’t able to haul as much cargo as I would like to. The smaller diameter front wheel and lowered payload all help contribute to stability when hauling large/heavy loads.
I aim to build a cargo bike similar to that of Cetma or Bullitt. A low center of gravity with the payload up front will offer stability when loaded down. Also, the steering linkage will provide a challenging opportunity. I’ve already begun designing the potential build in CAD.
For now, I will continue to relish having taken an idea and a pile of tubes all the way to a complete frame. After some miles in the saddle of the new frame I would argue that Kennedy’s quote is in need of some slight amending. There is nothing that compares to the pleasure riding a bike built by one’s self.
I was fortunate enough to break away during final’s week to gain some mental clarity on the new ride. After a half century with a good friend, I’m reminded that a good day on a bike with great company results in the volume in life getting turned down. Tomorrow I will go about my day, but everything will have a muted tone to it. The fact remains that bikes are cheaper than therapy, perhaps everyone could just use a little higher dosage of Vitamin G
After putting a few hundred miles on the frame I began to notice that the non-drive chain stay was out of alignment - causing conflict with the crank arm. On a late night ride back from Solon, IA my non-drive crank fell off! A buddy towed me back into town (about 3 miles) and I inspected the cause. I think the constant knocking of the crank arm on the chain stay was the root of the problem. The following day I used some elbow grease to re-align the frame. Unfortunately, I put a bit too much mustard into the endeavor and creased the problematic chainstay. I could cut it out and weld in a new one, or fill the crease with brazing. For now, I will set the frame aside and determine it's fate later. In its stead I procured a 2012 Kona Unit frame to build up with the same parts. It turns out I actually like the geometry of that frame much more. So, now the handbuilt frame will adorn a wall somewhere.
Update
I've since singled out the Kona Unit and sold it to a deserving gentleman in the Twin Cities. I kept the wheels, for a new build that I'm hoping will replace this bike and the Pugsley...